This article is an introduction to Google sheets for beginners, a spreadsheet software.
What does Google sheets do, and Why learn it?
Google Sheets, like other spreadsheet software, looks like tables with rows and columns. Each cell allows you to save data, (information) and do mathematical calculations. Excel is another spreadsheet software, but the main difference is that Google sheets is cloud-based, meaning it runs on the internet. The first spreadsheet program, VisiCalc, launched in 1979. Today, spreadsheets help do many things such as:
- Budget tracking
- Grade tracking
- Task management
- Personal finance
- Inventory management
- Data analysis
- And much, much more!
Fun fact: Spreadsheets (like Google Sheets) are so influential that October 17th is now recognized as Spreadsheet Day worldwide!
Getting Started
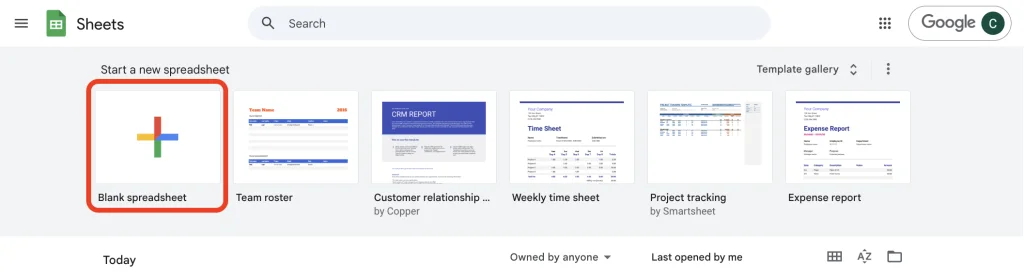
To create your first spreadsheet, navigate to Google Sheets and click the blank template with the plus icon. This opens a fresh workspace where you can start organizing your data.
Understanding the Interface
The Google Sheets interface has some of the following features:
- Tool bar and formatting tools at the top for styling and functionality
- Cell area – where you will store your data
- Formula bar shows the contents of your selected cell
- Columns and rows – to specify your cell location

Building Your Focus Tracker
Step 1: Name Your Project
Click “Untitled spreadsheet” at the top and rename it “Focus Tracker” – let’s see how we can use this sheet to help us balance screen time with studying time.
Step 2: Create Your Structure
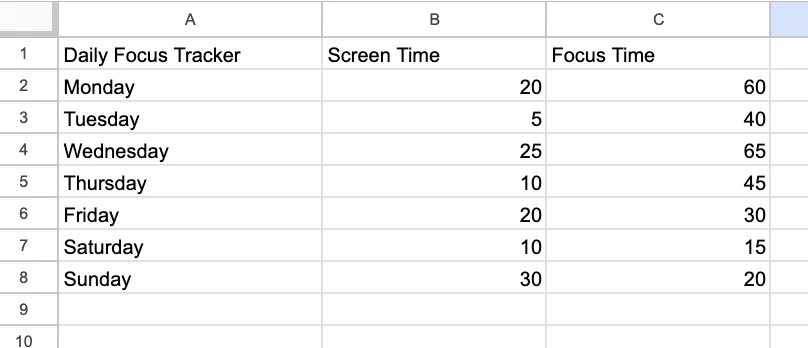
Start by adding a title in cell A1: “Daily Focus Tracker”
In cell A2, begin listing weekdays starting with Monday, Tuesday, Wednesday.

Step 3: Use Smart Autofill
Here’s where Google Sheets saves you time. Instead of typing every day manually:
- Select the three cells containing Monday, Tuesday, Wednesday
- Look for the small circle at the corner of your selection
- Drag it down – Google Sheets recognizes the pattern and fills in the rest of the week automatically!
Step 4: Add Your Data Columns
In column B, add “Screen time (min)” and in column C, add “Focus Time (min).” Then add some data:
- Monday: 20 screen, 60 focus
- Tuesday: 5 screen, 40 focus
- Wednesday: 25 screen, 65 focus
- Thursday: 10 screen, 45 focus
- Friday: 20 screen, 30 focus
- Saturday: 10 screen, 15 focus
- Sunday: 30 screen, 20 focus
Making It Look Professional
Good formatting makes your data easier to read and understand.
Format the Title
- Select your title and make it bold
- Increase the font size for emphasis
- Add a background color to make it stand out
Sharing and Collaboration
- Click the File button in the top right, then click Share
- Enter email addresses of people you want to collaborate with
- Set permissions:
- Editor: Can make changes to your data
- Viewer: Can only see the information
- Commenter: Can add feedback and suggestions

🎉 You did it!
You now have a functional Focus Tracker and understand the core concepts of Google Sheets. We hope you enjoyed this introduction to Google sheets and continue practicing new ideas in your spreadsheet, such as:
- Data entry and organization
- Smart features like autofill to save time
- Formatting to make information clear and professional
- Sharing for collaboration
- Organization with multiple sheets